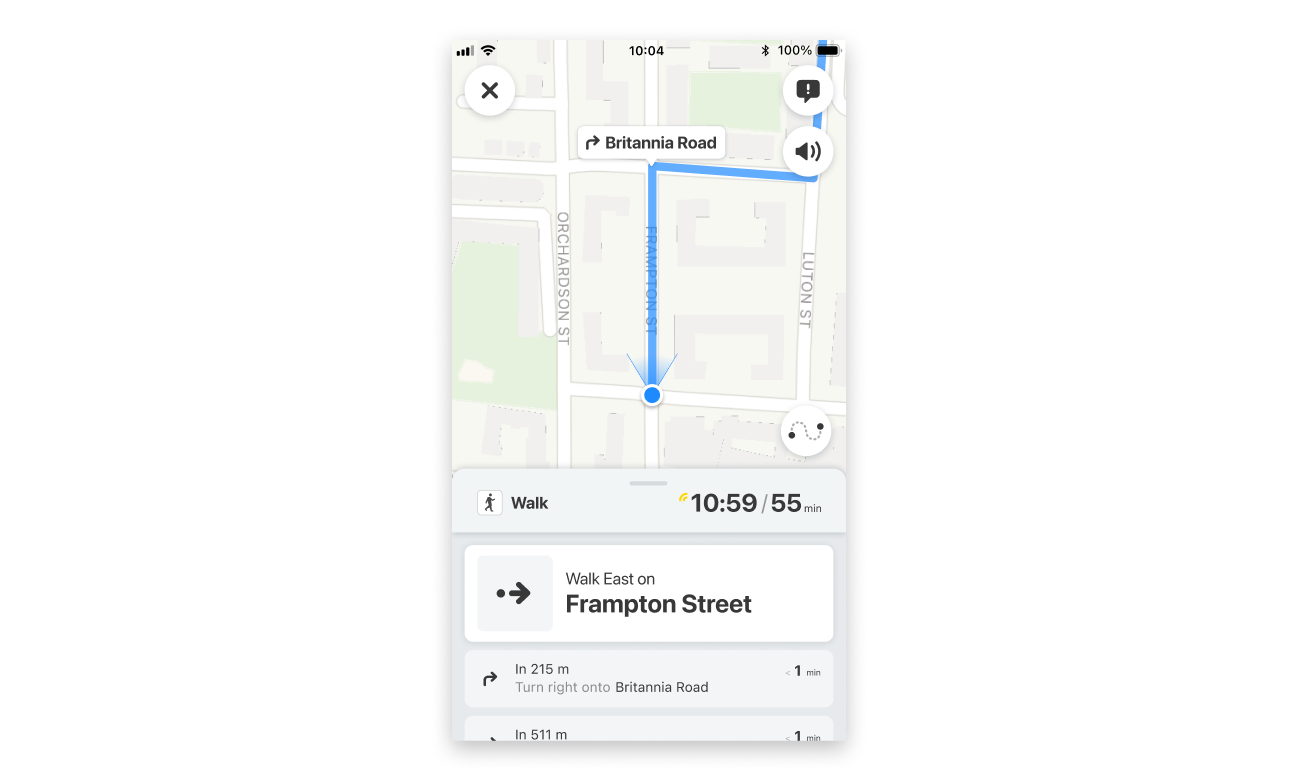
Display walk turn-by-turn navigation#

There are a few different ways to display and start turn by turn navigation.
Starting navigation from GO button#
The Citymapper SDK includes out of the box UI for displaying turn-by-turn navigation. By default, the UI displays an overview of the route, with a "GO" button to start navigation.
See Display Walk route in details
Starting navigation immediately#
It may be instead preferable to have navigation active already when showing the SDK UI, instead of having a visible "Go" button. For example, the user may have already tapped on a call-to-action to start navigation.
In this case, call startNavigation call on the obtained NavigableRoute object before showing any UI.
let route = ... // A previously obtained Route object
let navigationTracking = CitymapperNavigationTracking.shared

let navigableRoute =
    navigationTracking.createNavigableRoute(
        seedRoute: route,
        trackingConfiguration: TrackingConfiguration(...)
    )

navigableRoute.startNavigation { result in
    // If success, show the ViewController as above
}
val route = ... // A previously obtained Route object
val navigationTracking = CitymapperNavigationTracking.getInstance(this)

val navigableRoute =
    navigationTracking.createNavigableRoute(
        route,
        TrackingConfiguration(...)
    )

navigableRoute.startNavigation { result ->
    // If success, navigate to CitymapperDirectionsView
}
In this flow, it is advisable to set up the View/ViewController so that it will not show the overview state with a "Go" button if navigation is stopped.
let vc =
    DirectionsViewController(
        for: navigableRoute,
        configuration: DirectionsViewController.Configuration(
            navigationControls: .defaultControls,
            // Always returning `CloseNavigation` will ensure that the "Go" button state
            // is never shown
            stopNavigationTrackingAction: { _ in .closeNavigation }
            closeAction: { [weak self] in
                self?.navigationController?.popViewController(animated: true)
            },
        ),
        theme: BasicTheme()
    )

show(vc, sender: self)
directionsView.configure(
    navigationControls = Default,
    // Always returning `CloseNavigation` will ensure that the "Go" button state
    // is never shown
    onStopNavigationTracking = { CloseNavigation },
    onClose = { /* Navigate out of this screen, e.g. by calling onBackPressed() */ }
)
Passing Route objects between Activities or Fragments (Android)#
If the planning screen is in a different Activity or Fragment to the one containing CitymapperDirectionsView, the Route data must be passed between screens.
val route = ... // A previously obtained Route object
val citymapperDirections = CitymapperDirections.getInstance(this)

// The returned `StoredRouteHandle` is a Parcelable object, that can be
// added to Fragment or Activity arguments
val handle = citymapperDirections.storeRoute(route)

// ....later on

val route = citymapperDirections.loadRoute(handle)
The storeRoute call persists the Route data to disk, so it can be loaded after process death. Only one
Route is currently saved - subsequent calls to storeRoute() will override the currently saved object,
and further calls to loadRoute with a previous handle will return null
Advanced integration#
It is possible to integrate directly with navigation sessions, for example to determine whether a navigation session is currently in progress, or even to build completely custom navigation UI.
For more details, check out
Visual styling#
The Citymapper SDK offers theming capabilities to help it fit in with your app.
For more details, check out